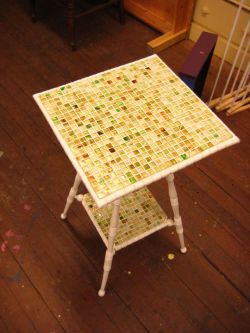
Furniture, especially table tops, endure tons of abuse. Do you have a beloved end, center, or dining-room table that has become an eyesore? Listen up for an opportunity to rejuvenate and grant it a new lease on life.
For this step-by-step process, in addition to the piece of furniture you will need a few basics:
•Caulking gun
•Grout
•Paper towel (Or nylon tiling brush)
•Putty knife
•Tile (Mosaic is quite common)
•Tile adhesive (Do not use mortar)
1. Once you have everything on hand and have selected a tile, make sure your chosen furniture is clean and dry. Then use the caulking gun to apply a thin layer of the tile adhesive to the table top. In the case of larger furniture, apply the adhesive in sections, place the tile (step 2), and then apply more tile adhesive to the next section.
2. Making sure the plastic-sheet side is up, apply the tile on top of the adhesive. Make sure it is aligned and straight.
3. Now, your tile will need to set. Placing something on top ensures proper adhesion. We recommend something larger and flat, with an even weight distribution. Books and similar items around the house will help the tile set evenly for 48 hours.
4. Next, remove the plastic covering from the tile. Then it will be time for grout. Pick a shade that will complement your tile selection and fit the room’s décor. You will not need much for this project depending on the size of your furniture, maybe a few pounds at most. Add water until the mix is the consistency of peanut butter and use the putty knife to fill in the cracks between the tiles.
5. It will take about an hour for the grout to dry enough to clean. Use a nylon brush or damp paper towel to wipe the excess grout off the tile at that point. 48 hours later, your table should have fully cured.
Now, your rejuvenated furniture should have a water-resistant top and a unique beauty all its own. For a helpful video tutorial, try this one through Home Depot’s DIY Projects.
